Products / Quad2
Single-phase · Residential and C&I

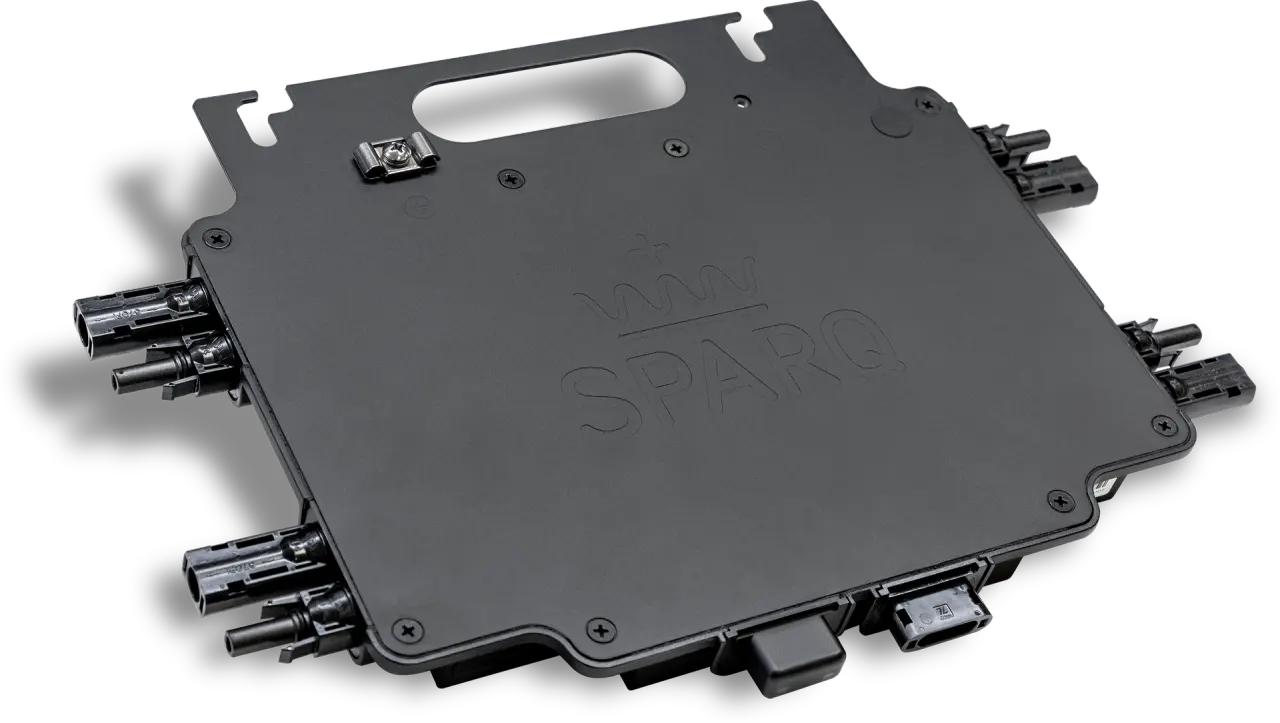
Quad2 microinverter

Unlike traditional microinverters (one PV module per unit), the Quad2 takes four individual DC input channels with independent peak-power tracking for up to four panels. Less installation time, less cable, more harvest.

4 DC inputs, individual MPPT String-class cost per watt
Quad2 microinverter
About the Quad2

Four panels, one microinverter

Traditional microinverters pair one photovoltaic (PV) module with one microinverter. Our Quad microinverters have four individual DC input channels, with independent peak power tracking for up to four PV modules. Per watt, a Quad needs fewer units, fewer mounts and less cable than one microinverter per panel, which cuts installation time and cable cost.

Our microinverters have been designed for high reliability, using patented technologies that eliminate the use of short-life electrolytic capacitors. This feature gives our microinverters high reliability and a design life of 25 years, matching the design life of PV modules.

Harvesting, panel by panel

  • 2000 W AC from a 3.3 kg unit
  • Dual-mode operation (on/off-grid)
  • Individual MPPT for each panel
  • SparqLinq: gateway for commissioning, control, and cloud sync
  • SparqVu: web monitoring with intuitive displays
  • SparqSync: user-friendly mobile app

Reliable & safe

  • No failure-prone electrolytic capacitors
  • All-AC cabling with inherent Rapid Shutdown compliance
  • No high-voltage DC on the roof
  • Lose four panels, not the array: a Quad fault affects its own four panels and the rest keep producing
  • Built to the panels' 25-year design life.

Cost-effectiveness

  • A 75% reduction in cable costs compared with one microinverter per panel
  • Lower installation costs: one unit, one mount and one AC connection per four panels
  • No fans and no electrolytic capacitors: nothing on the unit is a scheduled-replacement part
  • Lower lifecycle cost
On the roof · the whole install

Complete Quad2 installation

Watch the 8-step installation process, from start to finish.

SPARQ's Quad2 installation film, on the Queen's University test roof in Kingston
Step 1 of 8 · what the installer shows

Where we are

The rooftop of Queen's University in Kingston, Ontario: one of SPARQ's main test sites, where its microinverters are evaluated in real-world conditions and compared with traditional string inverters. Then the Quad 2000, its installation, and what each LED means.

Transcript8 paragraphs · 4:36

For panel selection, use the current Quad2 grid-tied or dual-mode datasheet. The recorded panel-rating narration predates these specifications.

[0:00] Hello, we are on the rooftop of Queen's University in Kingston, Ontario. This is one of our main test sites for evaluating Sparq Systems microinverters, where we test our products in real-world conditions and compare their performance with traditional string inverters to measure how much more electricity they generate. Here we briefly introduce the Sparq Systems Quad 2000 microinverter and its features. We will then go through installing the microinverter on the solar panels, and finally we will look at the LED lights on the microinverter and what each one means.

[0:33] Before installation, make sure the panel's standard test conditions (STC) voltage, power and current ratings are within the limits of the microinverter. Review the microinverter's datasheet and label, and cross-check them with the PV panel ratings. For instance, per the current Quad 2000 datasheet and label, it can be connected to PV panels with an STC MPP voltage of 20 to 50 volts, an open-circuit voltage of up to 65 volts, a short-circuit current of 16 amps, and a maximum PV wattage of 680 W. These values may differ for each Sparq Systems microinverter, as they increase with new developments in photovoltaic modules. Here we have an LG 400 W, 50 V, 10.5 A PV module. As you can see, the module's voltage, current and power ratings are within the microinverter's nominal range, so we check off module compatibility.

[1:32] Now we need to check the AC voltage and frequency ratings. Each Sparq microinverter can be used in either on-grid or off-grid mode; in this video we focus on on-grid applications. Again, refer to the microinverter datasheet and label and make sure the AC voltage falls within the microinverter's ratings. For a single-phase Quad 2000 microinverter, the AC grid can be split-phase 240 V at 60 Hz, three-phase line-to-line 208 V at 60 Hz, three-phase line-to-neutral 230 V at 50 Hz, or single-phase 230 V at 50 Hz. Now we measure the AC voltage on the grid side to make sure the grid is compatible with the microinverter's AC ratings. The grid voltage is 240 V split-phase at 60 Hz, so it is compatible with the microinverter, and we check off grid compatibility.

[2:26] Now we proceed with the installation. First, double-check your safety measures. Wear electrical safety gloves. Turn off the AC breaker and make sure there is no voltage on the AC side. Here we have our 6-gauge grounding cable. Grounding is very important for the safety of personnel, and it also protects the microinverter against grid voltage fluctuations, lightning, ring waves, and high voltage or current surges.

[2:57] Install the microinverter with the heat-sink side facing out, for proper heat dissipation and thermal performance. Secure the microinverter with bolts and nuts; we're using 14 mm here. We recommend serrated washers that cut through the paint on the enclosure to form a WEEB ground to the frame. Make sure the microinverter is tightened snug.

[3:16] Fasten the grounding cable to the grounding lug as shown. Run a continuity check with your multimeter and make sure it reads a resistance close to zero between the frame and the grounding lug. Then insert the PV MC4 cables into the microinverter's DC receptacles; they click when locked in place.

[3:51] Now check the power LED on the microinverter, the LED on the right side. It's blinking red, which means the microinverter can't see the grid yet. Connect the AC cable to the microinverter's AC receptacle, and the other end to the AC breaker. The power LED now shows solid green: the grid is recognized and the microinverter is ready to start feeding power into the grid.

[4:15] The microinverter waits out a connection delay set by the grid standards, and after a few seconds it starts generating. The power LED has changed to blinking green, which means the microinverter is successfully converting power from the PV modules and feeding it into the grid.

Technical specifications

Quad2 specifications

Electrical, mechanical and environmental ratings for model Q2000-4102, each with its source beside it. Where the grid-tied and dual-mode editions differ, the difference is called out.

SpecificationQuad2 · Q2000-4102Source every row: Datasheet Q2000-4102, Sep 23 2025, unless the cell says otherwise
Input (DC)
DC input power2000 WDatasheet, both editionsDM datasheetGT datasheet
Input channels4, independent peak-power tracking on eachDatasheet, both editionsDM datasheetGT datasheet
Panel rating per channel (STC)up to 680 WpDatasheet, both editions; SPARQ's own install film at 1:07DM datasheetGT datasheetWatch it at 1:07
Input power clippingNoneDatasheet, both editionsDM datasheetGT datasheet
Maximum input DC current16 A per channelDatasheet, both editionsDM datasheetGT datasheet
MPPT voltage range, full power34–45 V per channelDatasheet, both editionsDM datasheetGT datasheet
MPPT voltage range, extended20–60 V per channelDatasheet, both editionsDM datasheetGT datasheet
Start-up voltage19 V per channelDatasheet, both editionsDM datasheetGT datasheet
DC connectionMC4-compatible panel receptaclesDatasheet, both editionsDM datasheetGT datasheet
Output (AC)
Grid connection208 V L-L from 3-phase · 240 V L-L from split-phase · 230 V L-N from single-phaseDatasheet, both editions; SPARQ's own install film at 1:49DM datasheetGT datasheetWatch it at 1:49
Maximum continuous power2000 W at 52 °C (208 V) · 2000 W at 60 °C (240 V and 230 V)Datasheet, both editionsDM datasheetGT datasheet
Nominal output frequency60 Hz (208/240 V) · 50 Hz (230 V)Datasheet, both editionsDM datasheetGT datasheet
Power factor> 0.99 default, programmable 0–0.99 leading or laggingDatasheet, both editionsDM datasheetGT datasheet
Output THD< 2 %Datasheet, both editionsDM datasheetGT datasheet
Inrush current< 8 ADatasheet, both editionsDM datasheetGT datasheet
Output wiring14 AWGDatasheet, both editionsDM datasheetGT datasheet
AC connectorT5 AC micro male, part 98053Datasheet, both editionsDM datasheetGT datasheet
Off-grid AC output90–245 V, 55 Hz nominal, 54–56 Hz range dual-mode edition onlyDatasheet Q2000-4102 DM, Sep 23 2025. This section does not appear on the GT editionDM datasheet
Efficiency
Maximum efficiency97.5 %Datasheet, both editionsDM datasheetGT datasheet
CEC efficiency97 %Datasheet, both editionsDM datasheetGT datasheet
MPPT efficiency99.85 % static · 99.8 % dynamicDatasheet, both editionsDM datasheetGT datasheet
Standby consumption< 30 mWDatasheet, both editionsDM datasheetGT datasheet
Environmental and mechanical
Enclosure ratingNEMA 6, IP-67Datasheet, both editionsDM datasheetGT datasheet
Ambient operating temperature-40 to +65 °C (-40 to +149 °F)Datasheet, both editionsDM datasheetGT datasheet
Relative humidity0–100 %, condensingDatasheet, both editionsDM datasheetGT datasheet
Dimensions (D × W × L)32 × 261 × 357 mm (1.25 × 10.3 × 14.0 in)Datasheet, both editionsDM datasheetGT datasheet
Weight3.3 kg (7.3 lb)Datasheet, both editionsDM datasheetGT datasheet
Coolingnatural convection, no fansDatasheet, both editionsDM datasheetGT datasheet
Recommended mountingrack mount, two M8, 1/4 in or 5/16 in boltsDatasheet, both editionsDM datasheetGT datasheet
Warranty and design life
Standard limited warranty12 yearsDatasheet Q2000-4102, both editions, Sep 23 2025DM datasheetGT datasheet
Extended warrantyUp to 25 years on both grid-tied and dual-mode editions, subject to the extended-warranty termsConfirmed by Sparq, October 20, 2026Request warranty terms
Design life25 years. Design life is not a warranty termDatasheet Q2000-4102, both editions, Sep 23 2025DM datasheetGT datasheet
Certifications
Listed on the datasheetUL1741 · UL1741 SA / Rule 21 / HECO / Rule 14H · IEEE1547 · IEEE1547.1 · CSA 22.2 No. 107.1 · FCC Part 15 Class B · IEC 60068-2 (1, 2, 14, 30) · IEC 62109-1/2 · IEC 61727 · IEC 61000-6-1 / 6-3 · IEC 61000-3-2 · IEC 61683 · BIS IS 16221 (Part 2) · BIS IS 16169Datasheet, both editions; the test reports and certificates themselvesDM datasheetGT datasheetEN 61683 reportIEC 60068-2 reportIEC 61727 reportIEC 62109-1/-2 reportUL 1741 reportUL 1741 / CSA certificate .01-.02UL 1741 / CSA / SA certificate .03TÜV certificate .04SunSpec CS-000052 (SparqLinq)
Protectionpolarised PV connectors against reverse polarity · programmable anti-islanding · integrated GFDI · galvanic isolation · abnormal voltage or frequency trip in under 200 msDatasheet, both editionsDM datasheetGT datasheet
Same unit

Where a Quad goes

The same four-panel unit, on a home roof, a C&I array or a tower.

Rooftop, residential

Four panels per unit, mixed sizes and orientations on one roof. For your home

Commercial and industrial

Carports, warehouse roofs and ground mounts, built from the same repeating four-panel block. C&I systems

Telecom towers

Dual-mode operation means a site can run with the grid, without it, or across the gap. Towers

All applications

Get a quote